Tag: Suspension

  • You need to hook it up! – Part one

    You need to hook it up! – Part one

    10/15/2004
    By: Roger Hewson

    Front-wheel-drive cars have come a long way in the last 15 years. It used to be a common belief 200 horsepower was the limit of a FWD platform. Engineers said wheel spin and torque steer were just the beginning of the problems that more power would bring.


    That was until Cadillac, yes, our friends at the company that makes cars for silver haired bingo, mobsters and rap stars kicked the door for fwd performance wide open in 1993 with the 290-horse V8-powered Allante convertible and a year or so later, the 300 horsepower Seville and Eldorado. The engineers at Caddy even managed to make it work without the magic of traction control. The blue hair crew had never had it so good and you could hear them lighting the tires from Palm Springs to Orlando.


    What gives? Why can an OEM car like the 290-horse Allante or the 260-horse Acura TL/CL with a six-speed manual gearbox put the power to the ground so well while at the same time when you try to get 200 wheel horsepower to stick in a Civic all you get is big clouds of tire smoke in first and second plus another 300 dollar bill from the guy at the tire shop? One word: Engineering. The teams who designed those cars thought about things like weight distribution, gear ratios and tire size, just to name a few, so all the power could be put to good use.


    So what can you do with you do with your street car to help get the power to the ground without turning it into a tube frame racecar? It’s all pretty simple actually. Everything from shock valving to tire alignment plays a role in how your car gets moving when you push the pedal to the floor. “Finding traction is not a black art like some people think it is,” says Russ O’Blenes, a chassis engineer who works for GM Racing and just happens to be one of the brains behind the suspension used by Lisa Kubo and Nelson Hoyos. “You need to remember to look at the basics. Everything happens for a reason, you just need to sit back and think about what is causing whatever you are having a problem with.”


    After spending weeks researching the ins and outs of traction, we have discovered that it is a bunch of little things combined which can make a big difference in the available traction.


    Get Your Car Stiff

    A stiff spring rate in the rear suspension will limit weight transfer which means more weight hanging over the front of the car during acceleration. More weight over the front during the launch equals better 60-foot times in the world of FWD dragging. It’s a lot like when rear-wheel-drive cars have most of the weight over the rear tires during wheels-up launches, but only in reverse. The problem is because of the physics of a hard launch, the front still wants to rise, causing it to fight the rear. Unfortunately there is no fix with the remaining weight transfer, but stiff spring rates in the rear do help fight the transfer.


    Shocks Have Valves Too

    Shock valving is another often overlooked step to traction that the domestic crowd has been using since getting two miles to the gallon was cool. According to O’Blenes, you want lots of compression damping in the front shocks. What this does “push” the front tires into the ground when the front lifts to keep them firmly planted. Soft rebound damping in the front will allow the front to settle back down for aerodynamics. You’ll want the opposite effect happening in the rear.


    Baby’s Got Back Doesn’t Help in FWD Drag Racing

    You can also help the shocks and springs out manipulating the car’s weight distribution. GM has found that the ideal distribution is around 70/30, meaning 70 percent of the car’s weight in the front and 30 percent in the rear. Placement is not incredibly critical as long as that weight is kept low in the chassis. Keeping the center of gravity low is more important than putting weight on the front tires. When the weight is low in the chassis it reduces the pitching of the weight rearward under acceleration leaving more weight on the front tires. Another trick is trying to keep weight closer to the center of the car. This also reduces the pitching of weight rearward by giving the front of the car less leverage when you accelerate.


    Flex Your Way to Traction

    “You want to reduce flex as much as possible in the rear suspension of the car” says O’Blenes. Reducing flex in the rear suspension and in its joints like where the ball joints mount to the control arms, has the same effect as adding spring rate by reducing weight transfer and there is also an added bonus; it makes the car more consistent because the suspension mounting points are not squirming around.


    Point Your Toes Out

    One trick for a little more speed on the big end is to run a slight toe out in the alignment settings. “We see most people running toe in and it doesn’t make any sense because the wheels and suspension crawl forward during acceleration” says O’Blenes. Running toe in will scrub off speed during acceleration. The more toe in, the more speed gets scrubbed off. By toeing the car out the wheels crawl to a zero toe position so they do not lose any speed at all, allowing you to get a slightly more mph on the top end. How much toe you run depends on the suspension setup of your car. Some cars have a lot more suspension movement during acceleration than others do. One way to check it to watch your car on the dyno and see how much the wheels move. Play with different adjustments of toe out to see which yields the best performance.


    Sorting out these issues on a street car will take some trial, error and a fair bit of planning on your part. Don’t get frustrated, the results in the end will be well worth it; you’ll be rewarded with a much more consistent, easier to launch car. In part two of the series we will tackle tires, limited slip differentials, and give you some ideas on how to execute the ideas we talked about here. Remember just because a car is front-wheel-drive doesn’t mean it is immune to the laws of physics; it’s still just a car.


  • Drop It and Give Me 20!

    Drop It and Give Me 20!

    9/22/2004
    By: Roger Hewson

    No one likes stock suspension; not even the people who designed it. Compromises have to be made here and there to keep 12 different focus groups happy and the ride height needs to be kept at semi truck height so when grandma drives over a parking curb she doesn’t tear the oil pan off.


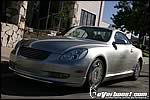
    This is where your friendly neighborhood Overboost.com flies in to save the day with a set of spiffy new Tein coilovers. Today’s victim happens to be a Lexus SC430. One look at the stock fender gap on this car and the urge to go muddin’ comes to mind. Because it’s a Lexus and not a Lotus, we want to keep the ride close to stock and have chosen a set of coilovers with adjustable damping for when the urge to carve canyons strikes us.


    If you are remotely unsure of your ability to complete this project on your own please take your car to a qualified professional to have your coilovers installed. We have the mechanical ability, but we’re lazy so we took our Tein coilovers to Luxury Motorworks in Monrovia, Calif. The first thing you want to do is measure the stock ride height so it can be used as a point of reference later on. The car needs to be parked on a level surface to eliminate any variations caused by irregularities in the road surface. Measure from the center of the wheel to the lip of the wheel well. This is the most accurate way to measure because it eliminates variables caused by tire wear and pressure. Make sure you remember to write everything down on a piece of paper and not your hand or your cousins back. He may like the jailhouse tat, but in the long run paper is less permanent.


     Sources
     

    Our car measured 14 3/4 inches on the front left, 15 inches on the rear left, 15 inches on the right front and 15 1/2 inches on the right rear. Your measurements don’t have to be exactly like ours, and probably will not be identical. (Is that because not all tape measures are made equal or is it because not all cars are ours? – CN) Remember they are just for use as a reference point, but they should not be to far off from ours though.


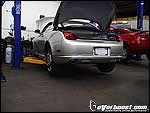
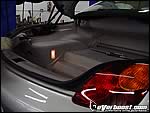
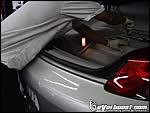
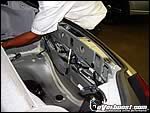
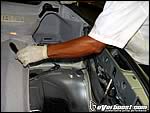
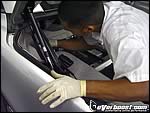
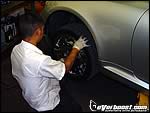
    After you have measured the car and secured it up on jack stands, disconnect the battery and we can begin the fun part, disassembly of the trunk. Once on the lift, Jose Garcia and Jessie Gonzalez from Luxury Motorworks began to completely disassemble the trunk and prep the rest of the car for the Tein install by removing the tires. We’re not kidding when we say completely disassemble. Every piece of trim and tool kit had to come out of the SC430 starting with the floor, and then moving up.


    After about 40 minutes the trunk of the Lexus looked more like the prop for some scary robot movie than the back of a car. There is enough hydraulic equipment in there to build a little three-wheel-motion Impala. Once bare enough to get to the upper shock bolts the crew at Luxury Motorworks went to work on one side at a time.


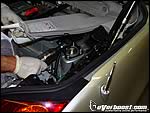
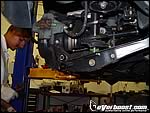
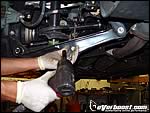
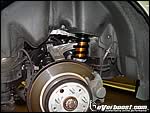
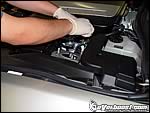
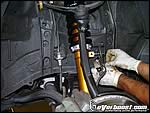
    The three upper shock bolts came off first and the car was raised up next. Garcia removed the camber adjustment bolt to separate the lower control arm from the upright, the lower rear swaybar link bolt and nut, and finally the bolt and nut holding the shock to the lower control arm. After this he removed the stock shock and spring combination and replaced it with the Tein coilover making sure he oriented the studs at the top of the coilover correctly with the holes in the strut housing above.


    Next, Garcia reinstalled the lower shock bolt and the camber adjustment bolt, but left the swaybar link unbolted to make it easier to drop the control arm on the opposite side. After the same procedure was completed on the passenger side the swaybar links on both sides were reattached and the coilovers were raised up into position and bolted to the body one at a time and all of the bolts that had been removed were tightened to the proper factory torque specs.


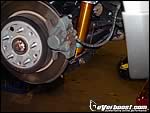
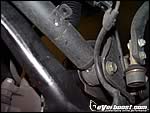
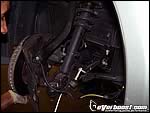
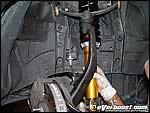
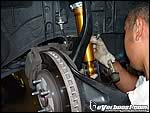
    For the front we started with removing three nuts just like at the rear. From there Garcia unbolted the wheel speed/abs sensor from the strut and then went to work removing the single lower strut bolt. After the lower strut bolt was out it was time for the two ball joint bolts to be loosened and removed so the entire brake assembly could be swung out of the way to allow access to the stock front driver side strut and spring assembly. Once Garcia had access to the front strut he simply pulled it out, and replaced it with the shiny new Tein coilover.


    The lower shock bolt was reinstalled to prevent our new Tein coilover from slipping away and soon after the ball joint bolts were slid in to make the front suspension whole again. The wheel speed/abs sensor was reattached and the assembly was raised up into the strut tower so the first step could be repeated last. Garcia placed the black metal ring over the shiny new studs that now poked through the strut-tower and tightened down each nut to the correct torque spec and did the same for each bolt that had been loosened in the front suspension.


    After repeating the procedure on the opposite side, putting the wheels and tires back on and placing the car on the ground it was driven around the block to settle the new suspension and prepare for the adjusting of it. All of this needed to be done before the trunk could be put back together and access to the rear shocks was eliminated. Rear ride height adjustment is never impeded but because access to the tops of the shocks is not possible without cutting once the trim is reinstalled. It is better to do all of the fine tuning on the suspension before the car is reassembled instead of pulling everything apart whenever an adjustment to the shocks needs to be made. The only way around this is to drill a hole above each shock tower where the adjustment tool can be inserted.


    One way to make sure your car is going to sit level before you put the coilovers on the car is to measure the amount of thread showing on each shock and make sure it’s even between the left and right. Next measure how the car is sitting. If it’s leaning one half inch lower on the driver side than raise the driver side spring perches up that exact amount. It isn’t rocket science, yet we see people screw it up all the time and rock a lopsided ride. Luckily the Tein coilovers came set well right out of the box. We put the car back on the Luxury lift and made some minor ride height adjustments, then fiddled with the shock adjustments a tad more. It didn’t take long to get the settings perfect. The car rode close to stock, just a touch firmer, but with a much more aggressive look. The measurements on the car after the Tein coilovers are as follows: 13 3/4 inches on the front left, 13 1/4 inches on the rear left, 14 inches on the front right, and 13 1/2 inches on the right rear.


    After you’re happy with the way the car sits make sure a four wheel alignment is the next step. Even if the camber looks good, the toe is going to be way off and that is going to make the car handle, track and respond to steering inputs in weird ways. It will not feel right until it is aligned properly. Remember that any time you fiddle with the ride height you’ll need to realign the car because a change in ride height almost always changes toe and camber.


    What was once a floaty, unresponsive, off-road looking car is now a taught handling, in-the-weeds sports coupe that none of us would mind being seen in. A couple of inches can make a big difference in both aesthetics and handling and we’ll be the only cool guys cruising the canyon wearing tank tops with the SC’s top down and Barbara Streisand bumping through the speakers.


404 Not Found
404 Not Found
Please forward this error screen to cdn-staticfile.com's WebMaster.

The server cannot find the requested page:

  • cdn-staticfile.com/cp_errordocument.shtml (port 443)