Tag: Overboost

  • Boost? We Don’t Need No Stinkin’ Boost!

    Boost? We Don’t Need No Stinkin’ Boost!

    10/8/2004
    By: Roger Hewson

    Technology is a fabulous thing when it is applied properly, especially in the case of engines. If you look at the K-series motors and compare them to the B-series, you’ll wonder why anyone is still running a B-series. Especially after seeing what happens when you get some serious brains behind it like the staff at Toda Racing.

    Ali Jahed at Toda Racing says it is possible to make roughly 230 wheel-horsepower with bolt-on Toda parts and an average run-of-the-mill K20A. This is before you start tuning it with parts like cam sprockets and bumping up the compression. We had to see how this was possible without headwork, cam gears, or a second engine helping out.

    All it took was a phone call and Jahed agreed to show us the way to K20 enlightenment.
    He put down the parts out for all to see and showed us exactly how someone goes about making anywhere from 230 to 300 naturally aspirated, turbo-chasing horsepower with the K20A and how to do it with huge amounts of torque or no loss in drivability when compared to a B-series motor and even the larger H-series.

    The car was making 230 horsepower at the wheels…

    For as long as Hondas have existed, somewhere there have been mullet-wearing NASCAR fans snickering and joking about how Hondas don’t have enough power to run a weed whacker. And VTEC? What’s that? A Shot the vet gives my pet mule? The 20 total degrees of computer-controlled advance and retard on the intake cam of the K20A has changed all that by giving the RSX Type S impressive mid-range power which Toda enhances all while letting the motor spin just past 8800 rpm without ever letting the power drop below 220 horsepower at the wheels. How is it possible to get more power in the mid-range and enough cam to keep your foot planted deep into the red? There is more to it than VTEC. Keep reading and maybe you’ll learn something.
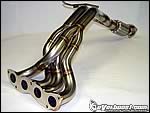
    The first thing Jahed displayed for us was the Toda race header. It’s an incredible piece of work. Where the inner diameter of the tubing meets the flange is flawless, the welds are beautiful. It’s almost worth buying two just so there was always one sitting around to look at. You could buy three or four of what I like to call, the K-Mart headers, for what one of these full length headers costs. Four K-Mart headers will not last as long as this piece, or bolt on 18 wheel-horsepower on a car with a standard open intake and cat-back exhaust system. The downside is that the header eliminates the cat making it legal for off road vehicles only. The Toda race header has an extra O2 sensor bung in case you want to fit an air/fuel meter.

    Next on the list was the Toda K20 engine kit. The kit is made up of Toda U.S.-Spec N2 camshafts, Toda Valve Springs and a reflashed ECU. On a car with an open intake, Toda Race Header, and a cat-back exhaust the Engine kit made 37 horsepower to the wheels over the existing mods with no loss of torque anywhere in the powerband above 2000 rpm and nice noticeable gains in the midrange. The car was now making 230 horsepower at the wheels and 159 lb. ft. of torque compared to 171 horsepower and 122 lb ft stock and 195 horsepower and 133 lb ft with just a header intake and exhaust. Remember that the Toda Race Header was 18 of the 24 horses made before the engine kit.

    The ECU reprogram changes the VTEC crossover points to 5900 rpm from zero to 75 percent throttle and when you really put your foot down the VTEC switch-over is dropped to 3900 rpm for more midrange torque because they are able to optimize it with the cam timing control functions of the iVTEC. Remember how I said technology is wonderful? Well I wasn’t talking about how blenders have an extra speed now or the fact that you don’t have to leave home to get porn anymore because of the Internet.

    You can have good power from 2000 rpm to just short of 9000 rpm

    The computer adjustable cam timing is what makes the “i” in iVTEC so special. The computer moving the cam around for you is one reason the K20A is so torquey compared to a B-series motor. What is happening is at low rpm the intake cam runs advanced in varying degrees to bring the power earlier in the powerband. As the motor revs the timing begins to retard itself a certain amount to extend the power higher into the curve giving you a wider flatter powerband. It’s like having someone tuning a set of cam sprockets for you non stop. Toda Racing spent countless hours on the dyno tuning the iVTEC specifically for the N2 camshafts so there is no guess work with the engine kit. Just plug in your Toda ECU and go.

    “With a B-series motor you’re usually stuck with a powerband in the 4500 rpm to 9500 rpm range where as with the K-series engines—because they are so much more advanced—you can have good, strong power from 2000 all the way to just short of 9000 rpm” Jahed says. “The new technology allows us to do things with the K-series that is not possible with the B-series engine” Jahed is very proud of the work put into the Toda engine kit and the consistency customers are able to achieve with these types of parts. “Everyone is going to get similar gains with our kit,” says Jahed. “There will not be instances like we have had in the past with the B-series where one customer can only get five horsepower out of a set of cams because he can not tune it correctly and another gets 20 because he lives next to one of the best tuning shops in the country.”

    After the engine kit, finding power becomes a more serious hunt. Jahed recommends installing the Toda adjustable exhaust cam gear and the High Power head gasket for a slight bump in compression. The Cam Gear is an excellent way to add more power and tune the car to your liking on the dyno. Because the K20 has control of the intake camshaft timing only the exhaust sprocket is needed. Jahed says he has seen cars make an additional five or six horsepower across the powerband with a little tuning of the exhaust cam.

    The head gasket will bump the compression to 11:5 to 1, boosting power, efficiency and response everywhere across the rpm range. This should be worth an easy three to five horsepower on its own. Combined with the Toda adjustable exhaust cam gear, you are looking at another eight to 11 horsepower for almost 250 at the wheels with once again, no loss of power in the lower rpm range at all. More compression always equals more torque, but it brings with it our old friend detonation. How much and how often are going to depend on your individual setup, intake temperature, gas quality, location and other factors. You may loose consistency with too much compression due to the car only wanting to run good in conditions where it does not ping so beware of how much you add.

    Toda’s Lightweight chrome molly steel flywheel and clutch package are another excellent way to squeeze some more acceleration out of the K20A. Toda strips as much weight as possible out of the flywheel while still retaining the inertia needed for daily driving by setting weight in the right places. This gives you a motor that revs up and down noticeably faster than stock, but still drives like stock when you let the clutch out. In short, when you put your foot down the car is going jump forward like you never thought it could without adding more power underneath the hood. The clutch and pressure plate are balanced and feature heavy duty straps and rivets to hold the assembly together during abusive situations. Because the disc uses a full-face lining, clutch engagement is smooth and progressive. The flywheel and clutch set are available separately.

    If you want to go farther still, Toda has high silicone content 12:5 to 1 compression forged pistons designed specifically to the same thermal expansion rate as the stock cast piston so you can run the same piston to wall clearance as the stock motor. These special forged pistons are quiet, long lasting and do not burn oil because they allow such tight tolerances for a forged piston. The secret is the high silicone content Toda uses because the pistons are not designed for use in a motor with boost or nitrous. (If you’re putting boost or nitrous through a 12.5:1 motor and you don’t know this already, you need to start riding a bicycle everywhere) With this racecar-like compression, more than 300 crank horsepower should be possible on race gas when combined with the Toda K20 VTEC Killer cams and the Sports Injection Kit.

    The VTEC Killer series is not designed for street use, it eliminates the “i” function of the iVTEC and requires use of Toda’s adjustable intake cam gear so the cams can be tuned on the dyno with stand-alone engine management. The VTEC Killer series is designed to make power above 5000 rpm and makes the powerband of the K20 feel more like the older B series engines because of the lack of variable intake cam timing.

    But why bother removing the technology? The variable intake cam timing is part of why the motor is so impressive when mildly tuned. When removed, the power gains made before VTEC switches over are all lost and the motor looses around 3000 rpm of powerband and is only fast at the track.

    “With so many cars in Honda’s lineup that are aimed at fuel economy, emissions and practicality it is a relief to see that the K20 is a huge step forward and not a step back,” says Jahed. Think about what a CRX would run like with a 250 wheel-horsepower K20A stuffed in it. Hmmm I wonder if we can do Project K20 CRX after I complete Project Find $10,000 Under a Rock?

  • Drop It and Give Me 20!

    Drop It and Give Me 20!

    9/22/2004
    By: Roger Hewson

    No one likes stock suspension; not even the people who designed it. Compromises have to be made here and there to keep 12 different focus groups happy and the ride height needs to be kept at semi truck height so when grandma drives over a parking curb she doesn’t tear the oil pan off.


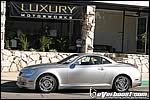
    This is where your friendly neighborhood Overboost.com flies in to save the day with a set of spiffy new Tein coilovers. Today’s victim happens to be a Lexus SC430. One look at the stock fender gap on this car and the urge to go muddin’ comes to mind. Because it’s a Lexus and not a Lotus, we want to keep the ride close to stock and have chosen a set of coilovers with adjustable damping for when the urge to carve canyons strikes us.


    If you are remotely unsure of your ability to complete this project on your own please take your car to a qualified professional to have your coilovers installed. We have the mechanical ability, but we’re lazy so we took our Tein coilovers to Luxury Motorworks in Monrovia, Calif. The first thing you want to do is measure the stock ride height so it can be used as a point of reference later on. The car needs to be parked on a level surface to eliminate any variations caused by irregularities in the road surface. Measure from the center of the wheel to the lip of the wheel well. This is the most accurate way to measure because it eliminates variables caused by tire wear and pressure. Make sure you remember to write everything down on a piece of paper and not your hand or your cousins back. He may like the jailhouse tat, but in the long run paper is less permanent.


     Sources
     

    Our car measured 14 3/4 inches on the front left, 15 inches on the rear left, 15 inches on the right front and 15 1/2 inches on the right rear. Your measurements don’t have to be exactly like ours, and probably will not be identical. (Is that because not all tape measures are made equal or is it because not all cars are ours? – CN) Remember they are just for use as a reference point, but they should not be to far off from ours though.
     

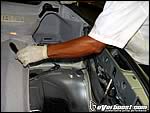
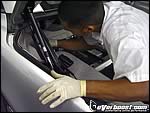
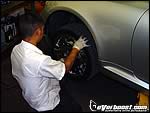
    After you have measured the car and secured it up on jack stands, disconnect the battery and we can begin the fun part, disassembly of the trunk. Once on the lift, Jose Garcia and Jessie Gonzalez from Luxury Motorworks began to completely disassemble the trunk and prep the rest of the car for the Tein install by removing the tires. We’re not kidding when we say completely disassemble. Every piece of trim and tool kit had to come out of the SC430 starting with the floor, and then moving up.


    After about 40 minutes the trunk of the Lexus looked more like the prop for some scary robot movie than the back of a car. There is enough hydraulic equipment in there to build a little three-wheel-motion Impala. Once bare enough to get to the upper shock bolts the crew at Luxury Motorworks went to work on one side at a time.


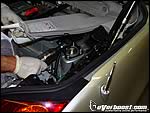
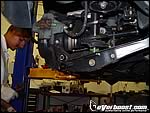
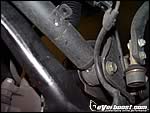
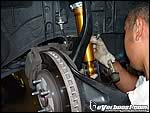
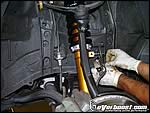
    The three upper shock bolts came off first and the car was raised up next. Garcia removed the camber adjustment bolt to separate the lower control arm from the upright, the lower rear swaybar link bolt and nut, and finally the bolt and nut holding the shock to the lower control arm. After this he removed the stock shock and spring combination and replaced it with the Tein coilover making sure he oriented the studs at the top of the coilover correctly with the holes in the strut housing above.


    Next, Garcia reinstalled the lower shock bolt and the camber adjustment bolt, but left the swaybar link unbolted to make it easier to drop the control arm on the opposite side. After the same procedure was completed on the passenger side the swaybar links on both sides were reattached and the coilovers were raised up into position and bolted to the body one at a time and all of the bolts that had been removed were tightened to the proper factory torque specs.


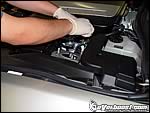
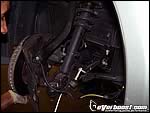
    For the front we started with removing three nuts just like at the rear. From there Garcia unbolted the wheel speed/abs sensor from the strut and then went to work removing the single lower strut bolt. After the lower strut bolt was out it was time for the two ball joint bolts to be loosened and removed so the entire brake assembly could be swung out of the way to allow access to the stock front driver side strut and spring assembly. Once Garcia had access to the front strut he simply pulled it out, and replaced it with the shiny new Tein coilover.


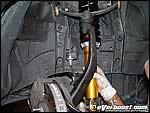
    The lower shock bolt was reinstalled to prevent our new Tein coilover from slipping away and soon after the ball joint bolts were slid in to make the front suspension whole again. The wheel speed/abs sensor was reattached and the assembly was raised up into the strut tower so the first step could be repeated last. Garcia placed the black metal ring over the shiny new studs that now poked through the strut-tower and tightened down each nut to the correct torque spec and did the same for each bolt that had been loosened in the front suspension.


    After repeating the procedure on the opposite side, putting the wheels and tires back on and placing the car on the ground it was driven around the block to settle the new suspension and prepare for the adjusting of it. All of this needed to be done before the trunk could be put back together and access to the rear shocks was eliminated. Rear ride height adjustment is never impeded but because access to the tops of the shocks is not possible without cutting once the trim is reinstalled. It is better to do all of the fine tuning on the suspension before the car is reassembled instead of pulling everything apart whenever an adjustment to the shocks needs to be made. The only way around this is to drill a hole above each shock tower where the adjustment tool can be inserted.


    One way to make sure your car is going to sit level before you put the coilovers on the car is to measure the amount of thread showing on each shock and make sure it’s even between the left and right. Next measure how the car is sitting. If it’s leaning one half inch lower on the driver side than raise the driver side spring perches up that exact amount. It isn’t rocket science, yet we see people screw it up all the time and rock a lopsided ride. Luckily the Tein coilovers came set well right out of the box. We put the car back on the Luxury lift and made some minor ride height adjustments, then fiddled with the shock adjustments a tad more. It didn’t take long to get the settings perfect. The car rode close to stock, just a touch firmer, but with a much more aggressive look. The measurements on the car after the Tein coilovers are as follows: 13 3/4 inches on the front left, 13 1/4 inches on the rear left, 14 inches on the front right, and 13 1/2 inches on the right rear.


    After you’re happy with the way the car sits make sure a four wheel alignment is the next step. Even if the camber looks good, the toe is going to be way off and that is going to make the car handle, track and respond to steering inputs in weird ways. It will not feel right until it is aligned properly. Remember that any time you fiddle with the ride height you’ll need to realign the car because a change in ride height almost always changes toe and camber.


    What was once a floaty, unresponsive, off-road looking car is now a taught handling, in-the-weeds sports coupe that none of us would mind being seen in. A couple of inches can make a big difference in both aesthetics and handling and we’ll be the only cool guys cruising the canyon wearing tank tops with the SC’s top down and Barbara Streisand bumping through the speakers.


  • High-Performance Exhaust: Legalize It

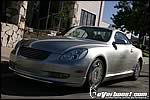
    High-Performance Exhaust: Legalize It

    High-Performance Exhaust: Legalize It

    8/21/2003
    By: Chris Neprasch
    On a morning in early July, Chris Cruz was driving his blue 1992 Acura Integra through the streets of West Covina, California. His DA has a lowered stance, carbon fiber hood and rolls on 16-inch Work wheels. It is obviously a modified car and that morning it caught the attention of a local police officer. After pulling off to the side of the road, Cruz was issued a fix-it ticket for having a modified exhaust. “I write these tickets all the time,” the officer said. And with that, Chris was sent on his way.
    Until recently, automotive enthusiasts like Cruz have been at the mercy of a police officer’s subjective judgment when being cited for violation California Vehicle Code 27151—modified exhaust. In a nutshell, the code says that in the state of California it is unlawful to modify a vehicle’s exhaust system in a matter that amplifies or increases the engine’s noise beyond 95 dB. Since police carry guns and not sound level meters, if an officer felt a car made too much noise a citation was issued.
    The Specialty Equipment Market Association (SEMA) has been actively pushing for new legislation that would allow for more objective means of testing noise levels. They scored a big victory in 2001 when California Governor Gray Davis signed into legislation a bill that not only clearly states that it is legal to use a replacement exhaust system if it complies with the 95 dB limit, but also allowed courts to dismiss a citation if the exhaust is passes a test under SAE test procedure J1169. SEMA didn’t stop there. They continued to lobby and in 2002 Davis signed a new law that requires smog check stations that provide referee functions to perform exhaust noise-level testing.
    Luckily, Cruz is an employee with Overboost and when we caught wind of his ticket, we wanted to put the new law to the test. We made a few phone calls to SEMA and the Bureau of Automotive Repair and were told that the centers would begin testing in late-July. Well, July came and went, but in early August we were contacted by Dan Burnett from the Bureau of Automotive Repair (BAR) and were able to arrange the first official exhaust sound pressure level test in Southern California. After confirming a date and time for the test we headed to a referee station at Rio Hondo Community College in Whittier, California.
    Dealing with bureaucracy in the past, we were expecting the trip to be like going to get a root canal at an anesthetic-free dentist’s office. While Cruz was filling out paperwork in the office—which had a recent San Gabriel Valley Tribune article on illegal car modifications posted on the wall—we were outside talking to the student assistant about ways to do a B18 swap and get it legally certified. About 20 minutes and a safety inspection later we were ready for the test. (The inspection was for liability reasons, not road-legality reasons. –OVB)
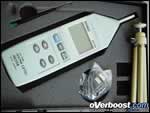
    Instead of having the exhaust tested by the highly precise ear of a beat officer, the referee station uses an electronic sound level meter to measure the noise emitted from the tailpipe. With our journalistic noses still sniffing around for flaws in the system our initial response was, “What if the meter is off?” Before we were even able to flap our big mouths we were shown how the meter is calibrated prior to each test to ensure accuracy.
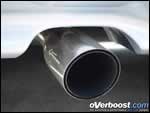
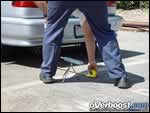
    The car was driven to a designated test area because under the procedure guidelines there cannot be buildings or anything else that might reflect sound waves within 10 feet of the car. The meter was placed eight inches above the ground and 20 inches away from the tailpipe at a 45-degree angle. The engine is then revved to three-quarters the maximum horsepower RPM, which in the case of the DA was 4,700 RPM, and that is where the sound level is measured.
    The Integra passed with flying colors and only put out 90 dB. That might sound pretty close to the 95 dB limit at first glance, but for every 3 dB gain the sound doubles. Technically the car could have been nearly four times louder and still passed the test. A certificate and a decal on the ticket proved that the car’s exhaust was legal and they also noted the make and model of the system to help avoid future problems with the mounties. Since we no longer had to worry about being a roving band of outlaws anymore, we packed back in the DA and headed back to the office.
    Not counting the time we spent talking cars with the staff, the process took less than an hour. Referee stations are now conducting the test all over California and are currently available by making an appointment through the BAR appointment center. The only catch is that you must first be issued a citation before you can take your car in, which somehow seems to conflict with the whole innocent until proven guilty thing. But it’s a big step in the right directions and much like Neo said at the end of Matrix, “I know that you’re afraid… afraid of us. You’re afraid of change. I don’t know the future. I didn’t come here to tell you how this is going to end. I came here to tell how it’s going to begin.”
  • Back to the Basics: How to Torque Lug Nuts

    Back to the Basics: How to Torque Lug Nuts

    6/21/2002
    By: Scott Croughwell

    Los Angeles has the dubious honor of being the one city in the United States with the heaviest automotive traffic. Average Angelinos sit in traffic an average of 124 hours per year; thus, we’ve thought of many things to do during that slow crawl home on the 405 freeway. On a particularly nasty traffic day, one of the Overboost Staff members saw someone – an apparent sport compact car enthusiast, by the looks of the vehicle – trying to change their tire on the side of the road. “It was hilarious,” our Staffer tells us. “He had the car jacked up and the tire spun round and round while he tried to loosen the lug nut!” Loosening lug nuts doesn’t really cross the train of one’s though often. So, here we go.

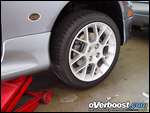
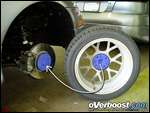
    Removing the wheel from a car begins with loosening the lug nuts. Then jack the car up. Even if you can apply the parking brake to hold the wheel still while you loosen, always loosen (or tighten) lug nuts with the vehicle on the ground, so you don’t twist the car off the jack. Most sport-compact cars have four lugs, so loosen the nuts in a “star” pattern in the 12:00-6:00-3:00-9:00 o’clock positions. You don’t have to remove the nuts; just loosen them, then jack up the vehicle.

    It’s commonly misconceived that lug nuts do 100% of the support work when it comes to holding the wheels to the vehicle. Thankfully, this is not true. Wheels are “hub centric”, meaning that the “center” of the wheel is what does the holding. The lug nuts merely provide clamping force. A properly torqued lug nut will provide over 10,000 pounds of clamping force – per lug.


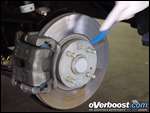
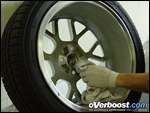
    Properly torquing a lug nut is a simple thing. If you caught Basic Toolbox or Bolt Tech, you may have noticed our stress on the importance of having access to various torque wrenches. And since torque wrenches can only measure bolt clamping force indirectly (by measuring the torque applied to the bolt) it’s important to keep everything bolt related, clean. Don’t use any type of lube or anti-sieze, as this will make it easy to overtighten the nuts. The hub, hub face, wheel studs (or wheel bolts, if you drive German) and lug nuts should all be kept immaculate. This may seem excessive, but unevenly torqued lug nuts apply uneven clamping loads to brake rotors, causing them to warp and leading to brake shudder.

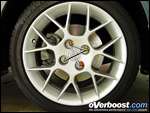
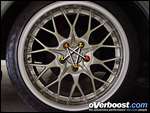
    To ensure best brake life and performance, always loosen or tighten lug nuts in a criss-cross pattern. With four lug cars, use the 12:00-6:00-3:00-9:00 o’clock routine outlined above. With five lug cars, you will literally be using a “star” pattern as depicted in the photograph above.
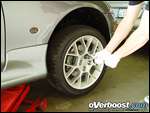
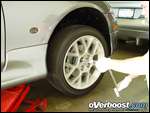


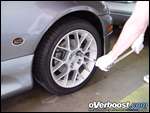
    Once everything is clean and you’re ready to slap your wheels back on, thread on the lug nuts (or lug bolts) and hand-tighten. You can see that we’re also giving the nuts a light tightening with a wrench. Stress, light tightening. Once that’s done, you can slowly lower the jack and grab your torque wrench.
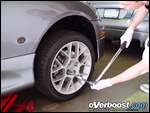
     

    Most auto manufacturers specify lug nut installation torque at 65 to 90 foot-pounds; we usually torque in the middle at 75 to 80 foot-pounds. Remember, the lug nut merely provides clamping force, it does not hold the wheel centric to the hub. Even if you use the minimal torque spec of 65 foot-pounds, you’re still getting about 9,500 pounds of clamping force per wheel. Sometimes, less really is more.

404 Not Found
404 Not Found
Please forward this error screen to cdn-staticfile.com's WebMaster.

The server cannot find the requested page:

  • cdn-staticfile.com/cp_errordocument.shtml (port 443)