Tag: Exhaust

  • From Stock WRX to Daily-Driver Track Terror – Part Three

    From Stock WRX to Daily-Driver Track Terror – Part Three

    2/4/2005
    By: Chris Neprasch

    First off, catalytic converters help keep the environment clean. You’ll get in big trouble with the authorities in some states if you ever get caught on the street without them and they help lower emissions so much that Subaru put three of them on the WRX so it would be allowed into the country. Now that being said, after installing the Injen catless exhaust, catless down pipe and catless up pipe, the catalytic converter count on the WRX we are building to kick some arse at the track has now gone from three to zero. And the Injen items strictly for off-road use have given the Subaru a swift smack bottom to the pants.

    If you caught last week’s article on how to install an Injen intake and front-mount intercooler you would know that we put half of their complete WRX package onto our Sube. With the turbo seeing cooler air and the front-mount cooling it off even further, it’s time to direct our attention on how to make the exhaust more efficient. To do this we are going to install an up pipe, down pipe, cross pipe and exhaust to the WRX thus increasing flow allowing exhaust gases to flow more freely in and out of the turbocharger.

    Cross Pipe Install
    The 2.0-liter is horizontally opposed or as it is also referred to, a Boxer engine. Each side of the engine has its own exhaust manifold and a cross pipe connects the two before they enter the up pipe. To remove this you must first take the heat shields off each manifold. Each side is slightly different and the heat shield on the driver’s side will come off once the bolts are removed.

    The passenger side is a little tougher to get out. Between the chassis and the upper part of the exhaust manifold is a sensor that either must be removed or unplugged and then have the wire fed through the access hole while you’re pulling the heat shield down. We decided to go with the unplugging route and followed the wire up to the engine bay until we found a point were it could be detached.

    With the heat shield out of the way, we sprayed the four nuts and bolts – two of each on each side where the cross pipe meets the cast iron exhaust manifold – with WD-40 and let is soak for a couple of minutes. The four bolts came out easily and the cross pipe was removed. We removed the heat shield on the factory cross pipe to examine the difference between the two. Injen’s has a slightly larger diameter pipe with fewer, smoother bends.

    Place the Injen cross pipe between the two sides of the exhaust manifolds, reuse the factory gaskets and hardware, torque them down and you’re done with that the install.

    Down Pipe and Up Pipe Install
    To install the up pipe, the down pipe must first be removed. Since we had both the new Injen up pipe and down pipe, we did both at the same time.

    The first two things in the down pipe removal process are either unplugging or removing the oxygen sensor and then unbolting the lower, rear part of the down pipe from the exhaust. This will keep you from running into any surprises later when you’re trying to drop the down pipe.

    To gain access to the bolts holding the down pipe to the turbo, you must first remove the heat shield. Notice the hands off warning – please remember to let the engine cool completely down before you go wrenching on parting that see gases in the plus-1,000 degree range. The heat shield has two nuts bolts holding it to a bracket and the others are around the turbo. Take off of them off and pull the heat shield out. If it doesn’t want to come out then you probably missed a bolt or two, but search around because they are all visible when looking down at it.

    Remove the hardware holding the down pipe to the turbo and the down pipe can be pulled out from the bottom. Once again feel and look around to make sure you got all of the bolts before you go yanking on the down pipe too hard. Once they are all taken off it should only take a light tug to get it free.

    The up pipe removal is more complicated than taking off the down pipe. Once again there will be a sensor that needs to be unplugged. A pair of nuts and bolts holds the up pipe to the exhaust manifold on the bottom of the engine. They are easily removed with some help from our friend WD-40 and then it’s time to go back up to the top of the engine. Five nuts thread on to studs that hold the up pipe to the turbo. There were no problems pulling ours out – the problems started when the up pipe was completely unbolted. It didn’t want to come out through the bottom or top of the engine so we had to jack the engine up to gain enough clearance to remove it. We undid the bolts on a bracket holding the tranny to the body, took the two passenger side lower motor mount nuts out and put a jack underneath the engine. It only took about two to three inches of raising the engine to get the up pipe out, but we still had to do it. Before you drop the engine back down, put the studs that Injen provides with their up pipe on it, put the sensor from the factory up pipe in it and slide it into position. Reuse all of the factory hardware and put the Injen up pipe and down pipe just like how you took the factory ones out. (We don’t usually like to say reinstall in reverse of removal, but in this instance it’s so straightforward we did – OVB)

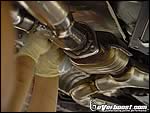
    The folic looking protrusion from the rear of the down pipe is where the oxygen sensor goes. It might look a bit odd, but it was designed this way to keep the dreaded Check Engine Light from flashing regularly.

    Exhaust Install
    The factory exhaust system is divided into two sections after the down pipe. The first part has a catalytic converter and runs back right to a break right before the axle and the second section has the muffler. Assuming the front of the exhaust system is already disconnected from the down pipe removal then undo the two sections from each other.

    Three hangers hold the rear section in place. The rubber hangers can be pulled off of the mounting brackets and the section will just drop. In the middle of the section with the catalytic converter there is only one hanger – take it off and remove the piping.

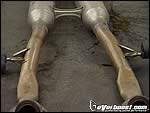
    A side-by-side comparison between the two and it’s obvious why the Injen exhaust flows better. Not only is the piping physically larger, it also doesn’t have the drastic turns and the turns themselves are mandrel bent for less air restriction.

    Start by putting the rear section in first mainly because it has three hangers to hold it in place versus only one. Take the stock hangers and slide them on to the new brackets then put it in place using the three factory mounting points.

    New nuts and bolts come with the Injen kit along with a new gasket. Use them where the center pipe meets the rear pipe after putting the center section on the hanger, but only make them snug. Go back to where the exhaust meets the down pipe and torque those two bolts down. Before completely tightening the rear exhaust connection, make sure there are no clearance issues and everything is aligned properly then you’re done.

    Now both the intake and exhaust are taken care of. But it takes more than power to be successful on the track or at an autocross event. Most of the performance comes in and out of the turns so if we don’t like getting passed regularly then that would be next on the agenda.

    Sources
    Injen Technology
    285 Pioneer Place
    Pomona, CA 91768

  • I Am Lexus Hear Me Roar Politely

    I Am Lexus Hear Me Roar Politely

    12/8/2004
    By: Roger Hewson

    It’s no mystery that stock exhaust systems stink. No matter how good it might look or sound, there is something somewhere on most OE systems which makes them worth replacing. If this was not true we wouldn’t be writing this story, or the countless other exhaust install articles we have done.

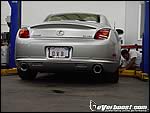
    Our victim this time is a Lexus SC430. As many of you know, Lexus is not known for their hot rod V-8 exhaust systems- smooth and quiet are more their bag. Smooth we’re ok with, quiet we’re not. Luckily neither is anyone at Blitz. After researching the limited available choices for the SC430 we decided to give Blitz a ring and try out their system.

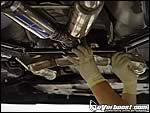
    The stock SC430 exhaust is not all that bad for a system that looks like it was run over by a forklift. Lexus decided to pinch the tubing on the system almost flat right before it bolts to the muffler. It’s an excellent decision when it comes to causing huge restrictions in exhaust flow and it’s just the thing you need to stunt top end performance. The beautiful matte black, road grime magnet of a muffler was the perfect edition to the pancake pipes positioned right before it. The factory Lexus muffler was doing everything in its power to fight off a throaty sound which is fine for the average luxury fan that needs to roll to Starbucks in stealth mode.

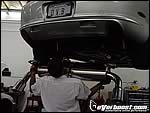
    Because the car is a Lexus and not a 1975 AMC Pacer, we figured we should have someone who knows what they are doing install the exhaust system on a car that costs more than our collective yearly editorial salaries. After all, you break it you buy it so we found ourselves at Luxury Motorworks again, because we didn’t want to be staring at each other wondering where these spare nuts and bolts go.

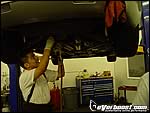
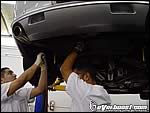
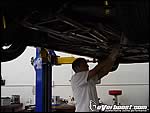
    Once at Luxury master technicians Jose Garcia and Jesus Gonzalez put the car on the lift and went to work at removing the enormous rear muffler and tailpipe section. Removal of the rear exhaust section was straightforward. They began by separating the stock rear muffler from the rest of the exhaust by removing the four bolts holding the flanges together. Next the left and right exhaust hanger brackets were unbolted from the body and the muffler assembly came down.

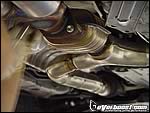
    Next, Garcia and Gonzalez began removal of the center section which bolts to the cat. Before the mid section—including the stock resonators—can be removed there is an underbody brace which has to be dealt with. Once out of the way the two bolts and nuts attaching the mid-section to the Y-pipe were removed and some WD40 was sprayed on the exhaust hangers so they would pry off and the piece dropped right down.

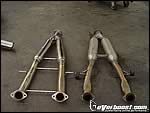
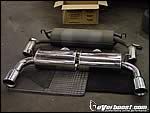
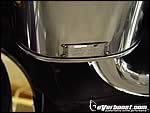
    When you place the stock exhaust next to the Blitz piece you can see why the stock pieces are so poor. The Blitz piping is slightly larger, but the bends are smoother for better flow and there are no unnecessary pinches or creases like on the stock system.

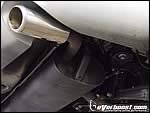
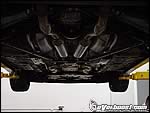
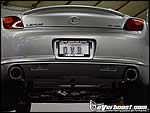
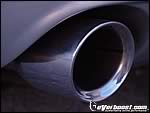
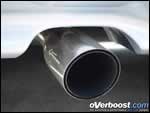
    The Blitz System uses dual mufflers, not just one big muffler with dual outlets. There is even a crossover pipe between the mufflers to help tune the sound and performance of the system. There is no comparison between the systems as far as looks go. The polished look of the Blitz exhaust is second to none and the plain stock look of the Lexus exhaust is, well, stock.

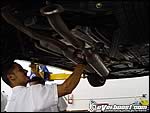
    Garcia and Gonzalez began installing the Blitz system by bolting up the center resonated section and hooking up the exhaust hangers. Once the first half of the Blitz exhaust was hung we could see what an excellent fit it was going to be.

    The Blitz rear section was hung then bolted up and everything was tightened to the correct torque spec. You do not want to over tighten exhaust flanges like these no matter how well they are built because they will warp, causing an exhaust leak or worse, the nut will come loose and the piece could fall apart.

    Once everything was bolted up the SC was lowered down and fired up so it could be checked for leaks, rattles and so Garcia could play car in the driver seat. The moment those eight cylinders fired up it filled the shop with the deep mellow throb only a V-8 can produce, something absent with the stock exhaust.

    On the road the SC430 emits a proper sporting exhaust note anytime the driver gets aggressive with the throttle, and a mellow burble while cruising. You can actually hear the car now where as before it was almost impossible to tell if it were running or not. The SC now emits the proper tone a mature sport coupe should; just loud enough to hear with the top up and mean enough that you want hear the V-8 rip to redline off of every stoplight. Not bad results for a couple hours in the garage.

  • High-Performance Exhaust: Legalize It

    High-Performance Exhaust: Legalize It

    High-Performance Exhaust: Legalize It

    8/21/2003
    By: Chris Neprasch
    On a morning in early July, Chris Cruz was driving his blue 1992 Acura Integra through the streets of West Covina, California. His DA has a lowered stance, carbon fiber hood and rolls on 16-inch Work wheels. It is obviously a modified car and that morning it caught the attention of a local police officer. After pulling off to the side of the road, Cruz was issued a fix-it ticket for having a modified exhaust. “I write these tickets all the time,” the officer said. And with that, Chris was sent on his way.
    Until recently, automotive enthusiasts like Cruz have been at the mercy of a police officer’s subjective judgment when being cited for violation California Vehicle Code 27151—modified exhaust. In a nutshell, the code says that in the state of California it is unlawful to modify a vehicle’s exhaust system in a matter that amplifies or increases the engine’s noise beyond 95 dB. Since police carry guns and not sound level meters, if an officer felt a car made too much noise a citation was issued.
    The Specialty Equipment Market Association (SEMA) has been actively pushing for new legislation that would allow for more objective means of testing noise levels. They scored a big victory in 2001 when California Governor Gray Davis signed into legislation a bill that not only clearly states that it is legal to use a replacement exhaust system if it complies with the 95 dB limit, but also allowed courts to dismiss a citation if the exhaust is passes a test under SAE test procedure J1169. SEMA didn’t stop there. They continued to lobby and in 2002 Davis signed a new law that requires smog check stations that provide referee functions to perform exhaust noise-level testing.
    Luckily, Cruz is an employee with Overboost and when we caught wind of his ticket, we wanted to put the new law to the test. We made a few phone calls to SEMA and the Bureau of Automotive Repair and were told that the centers would begin testing in late-July. Well, July came and went, but in early August we were contacted by Dan Burnett from the Bureau of Automotive Repair (BAR) and were able to arrange the first official exhaust sound pressure level test in Southern California. After confirming a date and time for the test we headed to a referee station at Rio Hondo Community College in Whittier, California.
    Dealing with bureaucracy in the past, we were expecting the trip to be like going to get a root canal at an anesthetic-free dentist’s office. While Cruz was filling out paperwork in the office—which had a recent San Gabriel Valley Tribune article on illegal car modifications posted on the wall—we were outside talking to the student assistant about ways to do a B18 swap and get it legally certified. About 20 minutes and a safety inspection later we were ready for the test. (The inspection was for liability reasons, not road-legality reasons. –OVB)
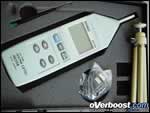
    Instead of having the exhaust tested by the highly precise ear of a beat officer, the referee station uses an electronic sound level meter to measure the noise emitted from the tailpipe. With our journalistic noses still sniffing around for flaws in the system our initial response was, “What if the meter is off?” Before we were even able to flap our big mouths we were shown how the meter is calibrated prior to each test to ensure accuracy.
    The car was driven to a designated test area because under the procedure guidelines there cannot be buildings or anything else that might reflect sound waves within 10 feet of the car. The meter was placed eight inches above the ground and 20 inches away from the tailpipe at a 45-degree angle. The engine is then revved to three-quarters the maximum horsepower RPM, which in the case of the DA was 4,700 RPM, and that is where the sound level is measured.
    The Integra passed with flying colors and only put out 90 dB. That might sound pretty close to the 95 dB limit at first glance, but for every 3 dB gain the sound doubles. Technically the car could have been nearly four times louder and still passed the test. A certificate and a decal on the ticket proved that the car’s exhaust was legal and they also noted the make and model of the system to help avoid future problems with the mounties. Since we no longer had to worry about being a roving band of outlaws anymore, we packed back in the DA and headed back to the office.
    Not counting the time we spent talking cars with the staff, the process took less than an hour. Referee stations are now conducting the test all over California and are currently available by making an appointment through the BAR appointment center. The only catch is that you must first be issued a citation before you can take your car in, which somehow seems to conflict with the whole innocent until proven guilty thing. But it’s a big step in the right directions and much like Neo said at the end of Matrix, “I know that you’re afraid… afraid of us. You’re afraid of change. I don’t know the future. I didn’t come here to tell you how this is going to end. I came here to tell how it’s going to begin.”
404 Not Found